If you’re new to boating, learning how to install an outboard motor might seem like a daunting task. However, with the right tools and guidance, this process can be straightforward and rewarding. In this beginner’s guide, we’ll walk you through the step-by-step process of installing an outboard motor on your boat, ensuring safety, efficiency, and performance.
What Is an Outboard Motor?
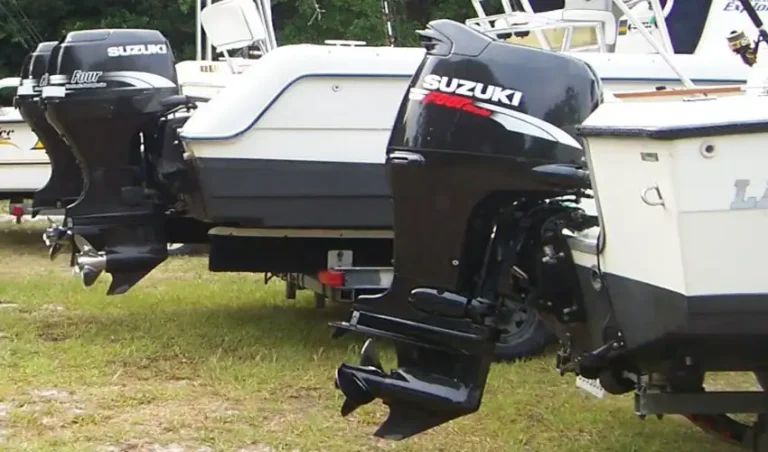
An outboard motor is a self-contained engine system that includes an engine, gearbox, and propeller, and is designed to be mounted on the outside of the boat’s stern (rear). It’s responsible for propelling and steering the boat. Outboard motors come in various sizes and power ratings to suit different boat types.
Tools and Materials Needed
Before beginning the installation, gather the following tools and supplies:
- Wrenches and socket set
- Power drill and drill bits
- Marine sealant
- Mounting bolts and washers
- Lifting device (if the motor is heavy)
- Safety gear (gloves, goggles)
Having everything prepared in advance will make the installation smoother and reduce potential risks.
Step 1: Choose the Right Motor
Before installing, ensure the outboard motors for sale matches your boat’s size and weight capacity. Check the manufacturer’s specifications on your boat’s capacity plate for the maximum horsepower rating. Choosing an overpowered or underpowered motor can lead to performance issues or even legal complications.
Step 2: Position the Boat
Place your boat on a stable trailer or lift it securely on a platform. Ensure the boat is level to get accurate alignment when mounting the motor. A flat, level surface ensures that the outboard sits at the correct angle, improving performance and fuel efficiency.
Step 3: Prepare the Transom
The transom is the flat back part of the boat where the outboard motor will be mounted. Clean it thoroughly to remove dirt, old sealant, or debris. Check for signs of rot or damage; a weak transom cannot support the motor’s weight and force. If needed, repair or reinforce it before proceeding.
Step 4: Align the Motor
Carefully place the outboard motor onto the transom. Use a lifting device or get help if the motor is heavy. Align the motor in the center of the transom, which ensures balanced steering and performance. Make sure the anti-ventilation plate (horizontal fin above the propeller) is level with or just below the boat’s bottom.
Use a measuring tape to confirm that the motor is straight and centered before securing it.
Step 5: Drill Mounting Holes
Most outboards come with a mounting template. Use it to mark the bolt hole locations on the transom. Ensure the marks are level and evenly spaced. Once confirmed, use a power drill to make the holes. Be cautious not to drill too deep or off-center.
Apply a marine-grade sealant around the holes to prevent water intrusion and protect the transom from rot.
Step 6: Bolt the Motor in Place
Insert the mounting bolts through the holes and secure them tightly with washers and nuts on the inside of the transom. Use a wrench to tighten the bolts evenly. Avoid over-tightening, which could damage the boat’s structure. Check the motor’s alignment once more before final tightening.
For motors that use clamps instead of bolts, ensure the clamps are secure and tightened fully.
Step 7: Connect the Controls
Next, connect the control cables for throttle, gear shifting, and steering. Most modern outboards come with plug-and-play connectors, making installation simpler. Route the cables neatly to avoid tangling or damage during operation.
Attach the fuel line securely to the engine and run it to the fuel tank. Make sure all fittings are tight and leak-free.
Step 8: Electrical Connections
Connect the battery cables to the outboard’s electrical system. Ensure the positive and negative terminals are correctly attached. Install an inline fuse if required. If your motor has electric start or gauges, connect these wires to your boat’s dashboard or control panel.
Check the connections with a voltmeter to ensure proper flow and grounding.
Step 9: Test the Installation
Before taking your boat out on the water, test the motor while the boat is still on the trailer (in water or using muffs with a hose). Start the engine and check for proper throttle response, steering, and gear shifting. Look for any leaks, loose fittings, or abnormal sounds.
Step 10: Take a Trial Run
Once you’ve completed all checks, take your boat for a short test run in calm waters. Monitor the engine’s performance, handling, and cooling system. If everything works smoothly, your outboard installation is a success.
Safety and Maintenance Tips
- Always follow the manufacturer’s guidelines.
- Regularly inspect the mounting bolts and connections.
- Use marine grease on fittings to prevent corrosion.
- Check oil, fuel, and cooling levels before each outing.
- Winterize the motor if you store the boat in cold climates.
Final Thoughts
Installing an outboard motor doesn’t have to be intimidating. By following this beginner-friendly guide and paying attention to detail, you can set up your engine safely and confidently. A properly installed outboard ensures your boat runs efficiently, giving you years of trouble-free enjoyment on the water.
